


This post is the 2nd part of the post Registering MySQL Server in NetBeans IDE which has explained the following operations:
- Start the MySQL Service on a local(XAMPP) Server
- Configure MySQL Server Properties
- Connect the Database Service
Before proceeding with this post, the steps listed above should have already been completed and a database connection with a local MySQL server should have been established in the NetBeans IDE.
If not done yet, complete the post Registering MySQL Server in NetBeans IDE before switching back to this post.
Once the database is connected to the IDE, we can work with MySQL in the IDE’s Database Explorer by performing database operations, such as creating new databases and tables, populating tables, and running SQL queries.
In the following, we will complete the five steps:
Creating a New Database Creating New Tables Creating a Foreign Key Populating the Tables Executing a Query
4. Creating a New Database
In the IDE’s Services tab window,
-
Right-click the MySQL Server instance node.
-
Choose
Create Database. TheCreate MySQL Databasedialog box opens. -
In the
Create MySQL Databasedialog box,- Type the name of the new database.
- Use
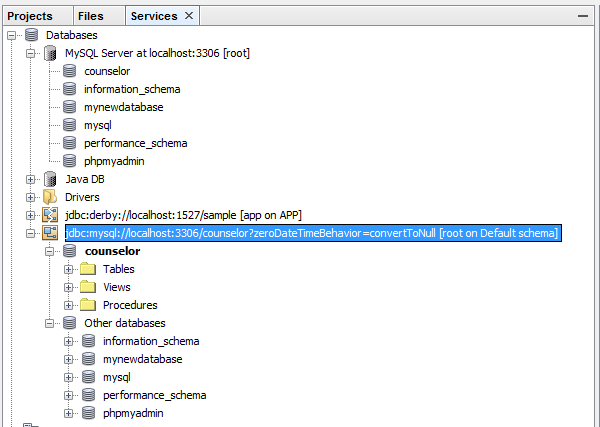
counselorfor the name. Leave the checkbox unselected at this time. Press OK.
Now a new database connection node should be created in the Services tab window. See the node in the following figure.
5. Creating New Tables
6. Creating a Foreign Key
7. Populating the Tables
counselor is currently empty. We plan to create three new tables counselor, subject and login.
In the IDE, it is possible to create a new table by either using the Create Table dialog, or by entering a SQL script and running it directly from the SQL Editor. Here, we write a SQL script.
Using the SQL Editor
In the Database Explorer, expand the new connection node. Note that there are three subfolders: Tables, Views and Procedures.
Right click the Tables folder and choose Execute Command.
A blank SQL Editor window opens in the main window.
In the SQL Editor, we can run SQL statements.
To create new tables, we can either add the new tables one after the other, or run the script to create them all in one execution.
In the following, we will run a SQL script that will create all the three tables. To do so, follow the following steps.
Download the script
Open the script
On the top of the IDE, click File-> Open File. Navigate to the script that you has downloaded. Select it. Then the script should open in the current SQL Editor window.
Read the script
Before running the script, we should take a look at the script to make sure that we understand the script about its expected result.
Execute the script
To execute the script, either click the Run SQL button in the task bar at the top (Ctrl-Shift-E), or right click within the SQL Editor and choose Run File.
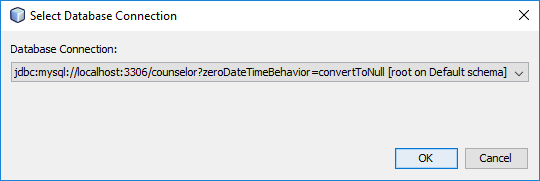
If the following dialog box pops up, choose the database where the new tables should be in. Press OK.
Press OK. The IDE will run the script. The execution results will show up in the Output window.
Verify the new tables
To verify changes, right click the Tables node in the Database Explorer and choose Refresh. The Refresh option updates the Database Explorer’s UI component to the current status of the specified database.
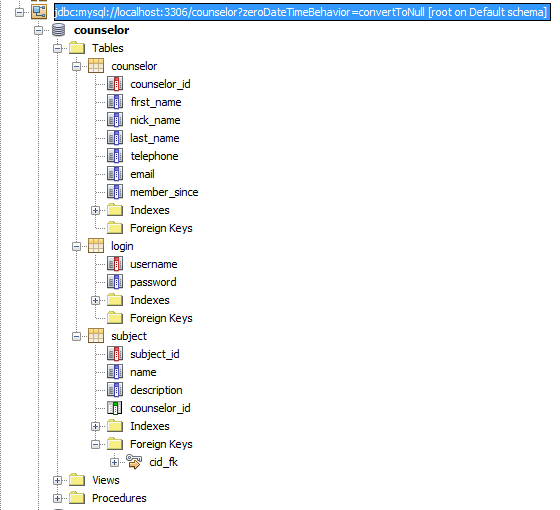
Note that the three new table nodes now displays under Tables in the counselor database node.
Expand each table node to see the columns (fields) in the table, starting with the primary key with a red bar indicator.
View the rows in a table
Right click a table name in the Tables node. Choose View Data....
A new SQL Editor window opens and shows the statement:
1SELECT * FROM counselor LIMIT 100;The query result is open below the Editor in a tabular view.
8. Executing a Query
Write a SQL SELECT statement that returns the subject(s) which the counselor, whose nickname is ‘The Snake’, specializes in.
Run the query to find if it will retrieve all the matching counselors.
Share this post
Twitter
Facebook
LinkedIn
Email