Here are several ways to test if Java JDk is installed in your computer.
If you like using Control Panel: Go to Control Panel–>Program and Features and check if Java /JDK is listed there.
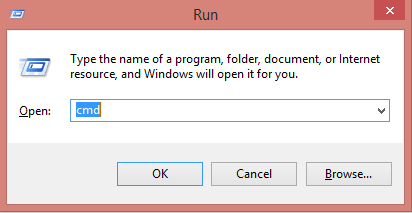
If you like using CMD: Press “windows button+R” in your computer, type “cmd” in Run Program.
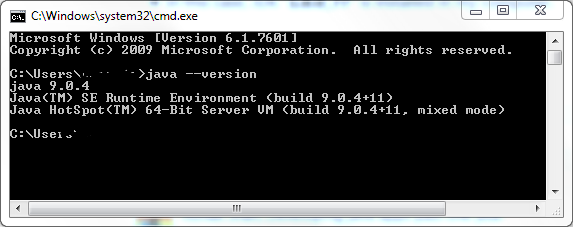
In the command prompt, type “java –version”. The return text, similar to the following though version numbers may vary, indicates that Java is installed in your computer.
If you like using Advanced settings: Go to start menu->System->Advanced->Environment Variables. Check if both PATH and JAVA_HOME are set correctly.
If none of the above work, search you file system for the file: javac.exe.
If yes, set PATH to the bin directory and JAVA_HOME directory in Environment Variables.
If no, you have to download JDK and install. Of course, you can always uninstall the current Java installation and do a new installation.
Installing Java JDK (special settings if you do this on a portable drive)
The JDK version you need is determined by the operating system.
Double click jdk-8u111-windows-x64.exe. If a User Access Control confirmation box appears, click Yes.
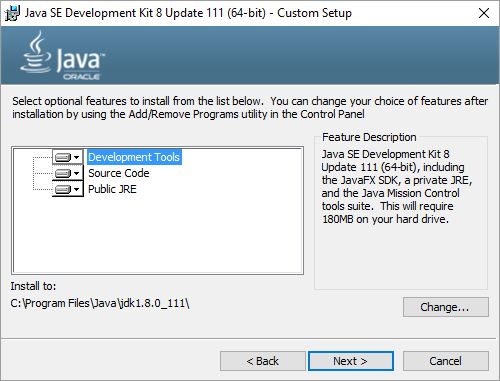
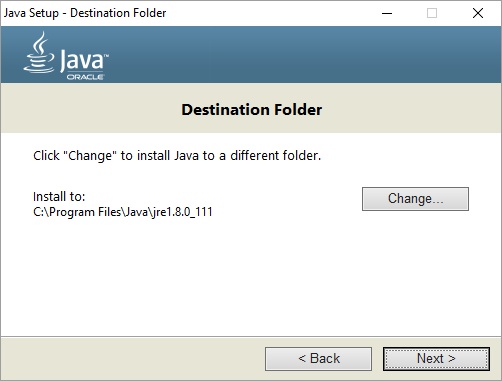
Click Next> until you see the following window.
In order to install JDK in a portable drive, it is critical that you change the directory below the text Install to:. To change the directory, click Change…. In the Folder name: text box, change the directory to I:\Java\jdk1.8.0_111.
Here, the letter I is an example of the drive letter which is assigned to your portable drive in the computer. Be sure to replace the letter I with the letter of your drive.
Press OK. Then click Next>.
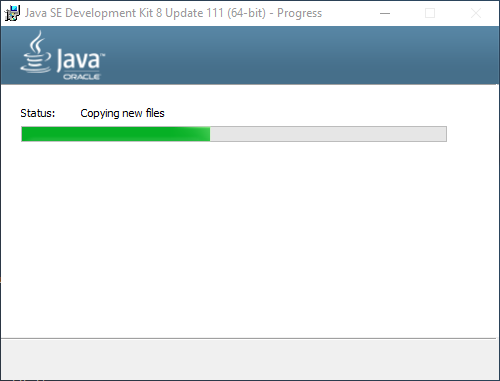
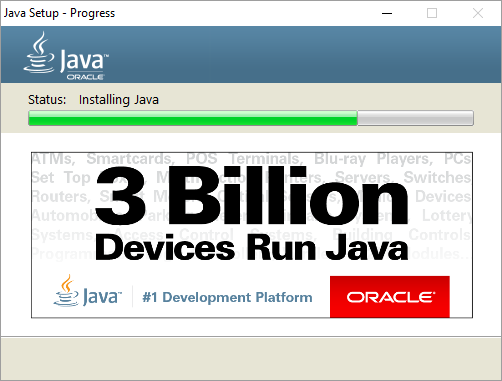
It will take a few minutes. Wait until the following window appears.
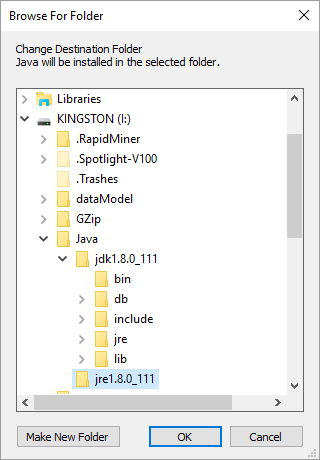
Click Change… button. In the following file browser, navigate to the folder Java in the portable drive. Make a new folder jre1.8.0_111.
Select jre1.8.0_111. Click OK. Click Next> button. It starts installing now.
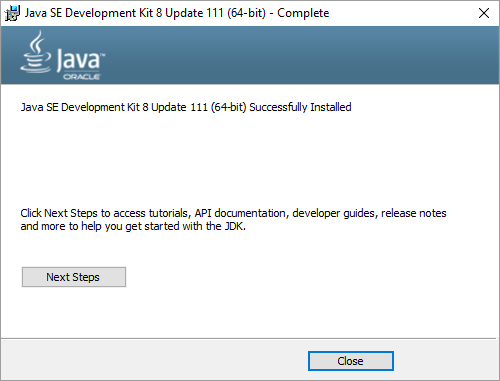
Wait until you see the window below.
Click Close to end the installation of Java JDK in your drive.
In the end, you may want to confirm the installation again by the steps in the “Installed or not” part.


Share this post
Twitter
Facebook
LinkedIn
Email